30 Jan 2012

How to Make Your Own Raisins

Are homemade raisins better than store-bought? Absolutely. These guys pictured here are juicy, sweet and fresh-tasting. The darker ones are from red grapes, the lighter from green.

I realize not everyone has a food dehydrator, but if you love experimenting with food, it's a great investment.

Step 1
Choose the freshest grapes you can, and go for seedless variety.

Step 2
Wash the grapes thoroughly, removing any stems.

Step 3
Place the grapes in your food dehydrator anywhere from 10 to 36 hours, depending on their size. It's easy enough to grab one at any time and test it for doneness.

Tips:
If you want to speed up the dehydration process, place the grapes in boiling water for about 90 seconds. This process is called checking, and it removes the natural wax coating and thus speeds up the drying process. If you've blanched the grapes beforehand, leave them in the food dehydrator for six to 10 hours.


27 Jan 2012

Quick Tip: Cooking with Garlic


Garlic can take a recipe from good to great, but bitter or burnt garlic can ruin it.

A common mistake is to overcook garlic. While many recipes suggest throwing it in with the onion, the onion benefits from a much longer cooking time. Garlic needs but a flash of heat as it burns very easily.

Another mistake is in not removing its centre, which is bitter and kind of nasty. Peel the garlic, and crush it underneath the blade of a substantial knife. Remove the root, or centre, and mince the rest. Then cook it at  fairly low heat for a few minutes at most.

If the root is green, the garlic will be pretty bitter anyway. It's still usable, but not as sweet as fresh garlic.

23 Jan 2012

How to Use Flax Seed


Flax seed is the new black — oh, you know what I mean. Its nutritional benefits are touted all over the place, and for good reason.

First of all, flax seed is chock full of alpha linolenic acid – aka Omega-3 fatty acid, which, as you probably know is good for just about everything – from  cardiovascular function to inflammation to immune function, to name a few.

Flax seed also has oodles of dietary fibre (soluble and insoluble), which keeps our plumbing in working order. And that's a beautiful thing.

In other news, flax seed wins the award for the highest concentration of plant lignans of all human foods. Lignans appear to have anti-carcinogenic properties.

And if that’s not enough, flax seed is also high in potassium.

  • Flax seed imparts a delicious, nutty flavour to baked goods, like breads, muffins, cookies and pancakes. But why stop there?  Add flax to your cereal, smoothies, dips and salad dressings. Hell, you can stir it into your juice if you’re so inclined. Be creative, and try to use some every day.  
  • You can substitute flax for six to eight percent of the dry component of a recipe.
  • Don’t forget to grind the flax seed before adding it to your foods. If you don't, it’ll go right through you, and you can bid good-bye to those beautiful Omega-3 fatty acids and that beloved dietary fibre.
  • Use a coffee grinder or a good old-fashioned mortar and pestle to break it up.
  • Ground flax seed will keep sealed in the refrigerator for many months. Whole flax seed will keep in clean, dry storage for a few years.

Quick Tip: Softening Lumpy Brown Sugar

Despite rumours that brown sugar is a "healthier" option, standard brown sugar is simply refined sugar coated in molasses. The molasses causes the crystals to cling together forming soft chunks, which can dry out and form hard lumps. Not fun.

To soften these hard lumps of sweetness, place them in the microwave for 20 to 30 seconds, or until soft. Alternatively, you can seal the lumps in a plastic bag with a piece of fresh bread or a slice of apple for several hours.

17 Jan 2012

Lentil-Chick Pea Salad


This awesome salad is fresh, light and all kinds of wonderful. Plus, it's healthy, so you can justify indulging in some of that eggless chocolate mousse for dessert!


Ingredients
1 can lentils
1 can chick peas
2 large tomatoes
3 tbsp. fresh parsley, chopped
Red onion, chopped finely
2 tbsp. olive oil
Salt and pepper to taste

Step 1
Drain and rinse the lentils and chick peas in a colander. Cut the tomatoes into bite-sized pieces.

Step 2
Mix the lentils, chick peas, tomatoes, parsley, onion, olive oil and salt and pepper. That's it. Now you've got yourself a healthy, delicious salad. Enjoy!

16 Jan 2012

Eggless Chocolate Mousse

I don't know about you, but I'm not big on raw eggs in my desserts. Sometimes it can't be avoided. For example, I wouldn't turn down a traditional chocolate mousse handed to me by anyone for anything...EVER. But when I make mousse, I prefer to make it simple: chocolate, heavy cream, sugar, vanilla and a touch of butter. Use the best quality chocolate you can.


Ingredients:
10 oz. heavy cream (35%)
2 tbsp. sugar
1 tsp. vanilla
5 oz. semi-sweet chocolate
1 tsp. butter

Step 1
Break up chocolate into small pieces and place it in a double boiler. (Fill a pot with about an inch of water and turn it onto medium heat. Place a stainless steel bowl overtop, and you've got a double boiler). Make sure there is absolutely NO water in the chocolate bowl or nasty things will happen. Water and chocolate do not friends make.

Step 2
Pour the whipping cream in a mixer and set it on high. Whip it until it's nice and stiff (about 2 minutes), adding the vanilla and sugar about halfway through the process.

Step 3
Remove the bowl of chocolate from the double boiler once it's thoroughly melted. Add butter to the chocolate and mix well with a rubber spatula.

Step 4
Fold the whipped cream into the chocolate carefully until just incorporated. Garnish with shaved chocolate and whipped cream if you're so inclined.

14 Jan 2012

Quick Tip: Defrosting Meats in a Hurry

Normally, it's best to thaw meat slowly in the refrigerator. But that can take a long time. Especially if it's a large cut of meat like a roast, which can takes days to defrost.

Another method is to defrost meat in a bowl of ice water, which thaws it much more quickly. Don't use warm or hot water, or leave the meat out at room temperature for extended periods, as those conditions favour microbial growth. And microbes are yucky and dangerous.

Bacon-Wrapped Pork Tenderloin

Bacon-Wrapped Pork Tenderloin

Mmm, pork times two. This is a super simple recipe with delicious results.

Ingredients
Pork tenderloin
Salt and pepper
1 tbsp. Dijon mustard
4 or 5 slices of bacon
1 tbsp. canola oil

Step 1
Preheat the oven to 375 F. Season the pork tenderloin generously with salt and pepper. Cover the entire surface of the tenderloin with Dijon mustard. Don't be skimpy here, make it a thick coating.

Step 2
Wrap the tenderloin in bacon, and secure it in place with kitchen twine.

Step 3
Turn the stove onto medium-high, and heat the oil in a frying pan. Once it's good and hot, sear the tenderloin until browned on all sides.

Step 4
Place the tenderloin on a wire rack (use the same one you cool cookies on), and put in the oven for 20 minutes or so, until it reaches an internal temperature of 145 F. Remove from the oven, and place on a cutting board to cool for ten minutes. Remove twine before carving.

How to Make Homemade Pancakes

Sounds too simple for a whole post, doesn't it? But still, people continue to buy pancake mixes in the store, even though making a flapjack from scratch is just as easy. Five ingredients, that's all. And, of course, you can customize them anyway you like. I personally like blueberry-banana pancakes.

This particular recipe makes a crepe-like pancake; the batter is quite thin, and the end result is flat and delicious.

Step 1
Mix 1 cup of flour, 1/2 tsp. baking powder, a pinch of salt and 1 tbsp. of sugar until just combined.
Add 1 cup of milk and two eggs and blend completely.

Step 2
Turn the burner on medium, and place the pan on the heat. Allow the pan to heat up for a few minutes, then add 1 tbsp. of butter.

Step 3
Once the butter is melted and spread around, spoon the batter in, the amount depending on the size of pancakes you're going for. Don't flip until the surface is covered in holes.

Tip:
Add 1/2 tsp. of vanilla to the batter for a delicious vanilla flavour.
Mash 1/2 a very ripe banana and blend it into the batter for banana pancakes.


13 Jan 2012

Quick Tip: Folding (Baking)


Folding is the process of mixing one delicate ingredient – beaten egg whites, for example – into other, less-delicate ingredients. The objective is to incorporate the mixture without deflating it. The best tool for folding is a large, flexible rubber spatula, and the bigger the bowl, the better. Here’s how it’s done:

Scoop the delicate egg whites, for example, on top of the other ingredients. Cut the spatula through the centre to the bottom of the bowl. Pull the spatula towards you, scraping along the bottom and up the sides. When you pull it out, rotate the spatula so the mixture falls back into the bowl. Now spin the bowl about 90 degrees and repeat until the batter is just incorporated. Don’t overmix.

Creamy Dip

I must admit, I used light versions of the first three ingredients, much to the chagrin of my chef husband who hates anything light.

Ingredients
8 oz. cream cheese, room temperature
1/2 cup mayonnaise
1/2 cup sour cream
4 green onions finely chopped
1 clove of garlic, minced
3 tbsp. of grated Parmesan cheese
3 tbsp. cheddar cheese
1 tsp. Worcestershire sauce
1 tsp. salt
1/2 tsp. pepper

Step 1
Place all the ingredients together in a bowl and blend thoroughly, preferably with an electric mixer.

That's it. Just one step.

Curried Cauliflower Soup


Ingredients
1 head cauliflower  (about 2 1/4 lb.) cut into florets
2 tbsp. canola oil
1 tsp. of salt
1 tbsp. butter
3 onions (sliced 1-inch thick)
1 1/2 tsp. curry powder
4 cups water
2 cups vegetable stock
2 tbsp. chopped fresh parsley

Step 1
Preheat oven to 450 F. On a baking sheet, toss cauliflower with oil and
salt. Spread out evenly, and roast until the florets turn brown, about 25
minutes

Step 2
In a medium pot, melt butter over medium-high heat. Add onions, and cook until soft, about 5 minutes.
Stir in the curry powder, roasted cauliflower, water and stock; cover and bring to a boil.
Once boiling, uncover, lower the heat, and simmer for five minutes.

Step 3
Scoop out 3 cups of cauliflower to a bowl, and set aside. Puree the soup using either a hand-held blender or a standing blender. Reheat if necessary. Ladle the soup into the bowls, and top with the reserved florets and
parsley.

12 Jan 2012

Quick Tips: Broccoli

Broccoli, a relative of cabbage, is one of those gas-inducing veggies that contains raffinose, a naturally occuring sugar. Choose firm, tight and dark green heads, avoiding stalks with woody edges. If the skin on the stalk is thick, peel it like you would a carrot. The stalk, a part many discard, is actually a very yummy addition to stir-fries, with a milder but still very broccoli-like taste.

As for the buds (the flowery part we're used to), don't cook them too long or they'll get mushy and more sulfrous. It's best to separate the stalks from the bud shoots for cooking, as the stalks take decidedly longer.

Quick Tip: Bain-Marie

Bain-marie is the French term for water bath, or putting a container of food in a shallow pan of warm water, surrounding it with gentle heat that cooks it gradually. This method is typically used for delicate dishes like custards or mousses so they don't break or curdle.

Egg dishes are often cooked this way, too, as the proteins in eggs become tough and rubbery when cooked at high temperatures.

Use a bain-marie for cheesecakes to prevent the top from cracking in the centre, and custards to prevent a crust from forming before the interior is fully cooked. 

Here's the technique in a nut-shell:
Place your container of food in a shallow pan. Fill the pan with boiling water so it reaches halfway up the dish. (If it hasn't reached a boil, it will take too long for the oven to heat it up.) Place in a moderate oven (like 325 F) and don't cover it.

And that's a bain-marie.

Lemon Pudding


I’m sharing my late mother-in-law’s recipe for the most amazing dessert ever. And I must add I’m an extreme chocolate lover, almost an addict. And this lemon pudding – even with no chocolate – is better than brownies. There, I said it. My husband always makes two batches, so he can nosh on one by himself in the basement while the rest of us are sleeping.

I present this recipe just as she had it written down, thus the unusual baker’s measurements.

Ingredients
Butter, the size of an egg
Scant cup of sugar
2 eggs, separated
1 cup milk
The juice and zest of 1 lemon
3 tbsp. all-purpose flour

Step 1
Beat the butter and sugar. Once combined, add egg yolks, milk, lemon juice and zest and whip for two to three minutes. Stir in flour.

Step 2
Whip the egg whites in a separate bowl.

Step 3
Fold in the egg whites and scoop into a glass casserole dish. The batter should be 1 1/2 to 2 inches deep.

Step 4
Bake at 325F in a bain-marie (water bath) for 25 to 30 minutes, or until golden brown. Allow it to sit for at least five minutes. Serve warm with vanilla ice cream.

Tip:
For best results, don't convection bake this lemon pudding.

11 Jan 2012

How to Make Croutons

Homemade croutons are cheap, easy-to-make and tastier than their store-bought counterparts. They're the perfect solution for that stale baguette or week-old loaf of bread you've got sitting around. Here's how to make 'em:

Step 1
Preheat the oven to 425 F.

Step 2
Cut your bread into uniform squares.

Step 3
Melt 1 tbsp. of butter in a pan and add 2 tbsp. of olive oil. Toss in two minced garlic cloves and some salt and pepper, stirring constantly for a minute or so.

Step 4

Add the bread cubes and mix them around, then season generously with salt and pepper. Place the greased, seasoned cubes on a cookie sheet and bake for about ten minutes, or until golden-brown. Once cooled, store them in a resealable plastic bag; they'll keep for months.

Chicken Pot Pie with Cheesy Biscuits

Use up that leftover chicken in this easy, kid-friendly dish. If you're short on time, you can use store-bought refrigerated biscuits or a pie shell instead.


Ingredients:
1 tbsp. canola oil
1 small onion or shallot, diced
2 large carrots cut in rounds
1 small sweet potato, cubed
1 clove of garlic, minced
1 cup each of frozen peas and corn
1 tbsp. all-purpose flour
1 cup chicken stock
1 cup chopped cooked chicken
Biscuits
1 1/4 cups all-purpose flour
2 tsp. baking powder
1/2 tsp. salt
2 tsp. sugar
1/4 cup butter, cold and cubed
3/4 cup sharp cheddar cheese, shredded
1 egg

3/4 cup of milk

Step 1
Preheat oven to 400 F. Saute the onion, sweet potato and carrots in the canola oil until the carrots are soft. Add the minced garlic, corn, peas and flour and stir for a few minutes.

Step 2
Add the chicken stock and let simmer for ten minutes or so, or until the sauce thickens.

Step 3
Add the chicken and pour it all in a pie dish.

Step 4
Sift flour, baking soda, sugar and salt together in a medium-sized bowl. Using a fork, press the butter into the flour until the mixture is crumbly. Stir in the cheese, and add the milk mixed with the egg. Stir until just combined. Turn out onto a lightly floured surface, and knead gently for a minute or so. Pat the mixture down to 1/2 inch thickness, and, using a floured biscuit cutter or glass, cut out your biscuits.

Step 5
Place the biscuits on the chicken mixture and bake for 20 minutes or so, or until golden-brown.

Quick Tip: Salting Cabbage

Presalting cabbage for cole slaw reduces its moisture content, creating a less-soggy end product; it also diminishes its bitterness.

Here's what you do: Shred a head of cabbage in your preferred coleslaw shape/size and place it in a colander over a medium bowl, or right in the sink. Sprinkle 1 tbsp. of salt and mix it through with your hands. Leave the cabbage for an hour or so -- don't worry if it looks soggy, that's just the moisture being pulled out. Rinse it in cold water, and dry it thoroughly with a clean dish towel.

10 Jan 2012

Quick Tip: Prevent Clumping Pasta


To prevent your pasta from sticking together, add 1 tbsp. of oil to the boiling water, moving the pasta through the oil as you immerse it. If you don't like the idea of adding oil, wet the pasta before putting it in the water.

Quick Tip: Hard-boiled or Raw Egg?


Can't tell if that egg in your refrigerator is raw or hard-boiled? Here's a simple trick: spin the egg on its side. The hard-boiled egg will spin quickly, like the Tazmanian devil, whereas the raw egg will be sluggish and sad, more like an injured turtle.

Chocolate Chip Cookies


Ingredients
1 cup butter, softened
¾ cup brown sugar
¾ cup granulated sugar
2 eggs
1 tbsp. vanilla
½ tsp. water
2 ¼ cups all-purpose flour
1 tsp. each of baking soda and baking powder
½ tsp. salt (if using unsalted butter)
2 cups chocolate chips

Step 1
Preheat oven to 375 F.

Step 2
Cream the butter and sugars together. Add the eggs, one at a time, then the vanilla and water. Mix thoroughly.

Step 3
Mix the flour, baking soda. baking powder and salt in a small bowl. Pour dry ingredients into the wet ingredients and mix until just combined. Now stir in the chocolate chips.

Step 4
On parchment-lined cookie sheets, place evenly sized dollops of cookie batter down, leaving space around each for expansion. Bake for about 10 minutes, or until golden brown.

Creamy Cole Slaw


Ingredients
4 cups finely shredded green cabbage
3 green onions thinly sliced
2 large carrots, finely shredded
2 apples, peeled and finely shredded
Dressing
1/3 cup light mayonnaise
1/3 cup light sour cream
1 tbsp. Dijon mustard
2 tbsp. cidar vinegar
1 tbsp. granulated sugar
½ tsp. each of salt and pepper
½ tsp. celery seeds

Step 1
Presalt the cabbage to extract moisture and diminish bitterness.

Step 2
Mix the cabbage, onions, carrots and apples in a large bowl.

Step 3
Mix the dressing ingredients in a small bowl with a whisk.

Step 4
Combine dressing and salad and chill until you’re ready to eat.

9 Jan 2012

How to Roast the Perfect Chicken

One problem with roasting a whole chicken is that it doesn't cook consistently. Some parts, like those big, luscious breasts, for example, cook faster than other parts -- like those pesky thighs. One solution to this, if you're so inclined, is to ice the breasts to keep them cool while bringing the bird to room temperature.

One other thing before you start: don't stuff the bird. Seriously, make the stuffing on the side. There's good reason: the stuffing needs to reach 160 F to kill any bacteria present, and by the time it does, the rest of the chicken is overcooked and dry. I know you love stuffing. So do I. Make it on the side. Try moistening it with chicken stock (as well as butter) so it gains some of that chicken taste.

Step 1
Remove the chicken from the refrigerator an hour before you're ready to cook and let it come to room temperature.

Step 2
Preheat the oven to 400 F. Remove any yucky stuff from the cavity (i.e. the giblets). Rinse the bird inside and out, and pat dry with paper towels. Season the cavity generously with salt and pepper, and add two cloves of crushed garlic and a scored lemon. Stick some fresh herbs in there, too, like thyme or sage.

Step 3
Slice a couple of onions into uniform (about half an inch) pieces and line the bottom of your roasting pan with them. If you're a skin person, cover it with butter or olive oil before seasoning. Otherwise, salt and pepper the skin generously without the added fat.

Step 4
Place the chicken breast side down on the onions, and place it in the oven for about an hour, after which time you're going to turn it over and let it continue cooking. Check for doneness after about 15 minutes. The breast needs to reach an internal temperature of 170 F; the thigh 180 F.

Step 5
Let the succulent bird sit on a cutting board for fifteen minutes or so to let its juices settle.

Tips:
Don't rely on those pop-up indicators: they suck, and your bird will overcook.

Don't truss the legs, which take longer to cook that way, resulting in one dried-out bird.

If you like crispy skin, don't forget the butter/oil part. Also, choose a chicken labelled Halal, kosher or air-chilled.

8 Jan 2012

Quick Tip: Thickening Pureed Soup

If you need to thicken your pureed soup, add a diced up raw potato or some uncooked white rice and let them cook in the soup to release their starches. Puree the soup again to give your soup more body.

Quick Tip: Fixing Burnt Sauces

If you've lightly burnt your sauce -- of course the best thing to do is make a new one -- but if that's impossible, here's a quick fix: add a small amount of acid into it, such as vinegar or lemon juice. The sour will counteract the bitterness of the burnt flavour.

4 Jan 2012

The Ultimate Kid Quesadilla

This quesadilla is pretty healthy, and the kids go crazy for it -- not running-around-the-house-like-rabid-coyotes crazy, mind you, just man-this-dinner-is-good crazy. For the dip, use whatever you like. I usually use an artichoke-asiago dip, but I've also used ranch dressing or a three-cheese dip. Once I even used a spinach dip. Wacky, I know. For a delicious, creamy herb dip recipe, follow this link.

Ingredients
1 boneless, skinless chicken breast
1 tsp. canola oil
1 apple
1 carrot
1/3 cup of shredded cheddar cheese
2 tbsp. creamy dip
6 whole wheat tortillas

Step 1
Cook your chicken and chop it up into small pieces.

Step 2
Peel the apple and shred it. Using paper towel or a clean dish towel, squeeze the shredded apple to rid it of excess liquid.

Step 3
Peel and shred the carrot.

Step 4
Mix the chicken, apple, carrot, cheese and creamy dip in a bowl.

Step 5
Rub a bit of water on one side of each tortilla. Those will be the outsides of the quesadillas. On the dry sides of three, evenly distribute the mixture. Place the dry sides down, and fry each one in a lightly greased frying pan until golden brown.

Cut each quesadilla in four and enjoy dipped in sour cream.

Quick Tips: Getting Rid of Stuck-On Food

Antacid tablets are for more than just relieving heartburn and indigestion. If your pot has baked-on goop, plop six antacid tablets in and fill it with water. Leave it to sit for an hour, then try and scrub it off. It should come off no problemo.

How to Hard-Boil an Egg (Like a Pro)

Hard-boiling an egg isn’t rocket science, and there are myriad methods that will achieve the desired result. But some methods are just plain better. With this method, you should achieve a perfectly boiled egg with its shell in tact that’s easy to peel. It should have no dark edges around the yolk. In other words, the kind of hard-boiled egg that dreams are made of. No more rubbery, misshapen whites with the goo floating around the water.


Step 1
Place your eggs in a pot. Make sure you have a single layer. Add enough cold water to cover the eggs by about an inch.
                      
Step 2
Turn the burner on high heat. As soon as the water begins to simmer, remove it from the heat and place the lid on. You don’t want a rolling boil at any point or you’ll get a rubbery consistency. Leave the eggs covered in the hot water for 12 to 18 minutes, depending on their size. Medium eggs cook in about 12 minutes, extra-large ones in about 18.
Step 3
Drain the hot water and replace it with cold water to stop the eggs from further cooking. Once cool, peel them immediately. Otherwise, store them in the refrigerator until you’re ready to use them. They’ll keep for a few days, but won’t be as easy to peel.

Quick Tip: Garlic in a Hurry

If you're whipping up a quick guacamole or salsa for your Mexican theme night, and don't have the time to peel and mince garlic (or if you're just a bit lazy like me), here's a quick tip:

Peel and cut the ends off of three heads of garlic.  Make sure they're fresh, so they hold their taste and colour.  Chop it up with a knife or garlic press, then soak the garlic in lemon juice or vinegar (the acid will prevent the chance of botulism forming). Transfer the contents to a tupperware container with a good seal. Add extra olive oil to ensure it's completely submerged. Seal the container and put it in the fridge, and you'll have fresh garlic for months.

How to Braise Pork Shoulder (Pulled Pork)


Mmmm...pork. Typically a pork shoulder doesn’t look too appetizing at the supermarket (but then what raw meat does?). It’s huge and fatty but very inexpensive. What’s it good for, you ask? One of my favourites: pulled pork. Ever have pulled pork and creamy cole slaw on a crusty bun? Try it, you won’t be disappointed.
The secret to great pulled pork is long and slow to tenderize the connective tissue that exists in the hardworking muscle. One tip, some ovens turn off automatically after a certain time, so watch it. I put mine in the oven after dinner one day and it turned off sometime in the middle of the night. With a tear in my eye, I had to throw that beautiful piece in the food waste.

Step 1
Preheat your oven to 200 F.

Step 2
Make your braising liquid. Finely dice some onion, carrots and celery and heat it up in the Dutch oven on the stove. Add a few tbsp. of canola oil. Once soft, add some minced garlic and heat briefly. Add your liquid (stock or tomatoes), then your acid (wine or beer). Add salt and pepper generously.
Now have some fun. Flavor it however you’d like. I like Worcestershire sauce and a little Dijon mustard in mine. If my 9-year-old were making it, he’d put in ketchup because that’s his favorite food. And, voila! There’s your braising liquid.

Step 3
Place the pork shoulder in the liquid. It should cover the bottom half only. Place it in the oven. The purpose of the low temperature is to avoid a boil. If it boils, the meat will become tough, so you want a gentle simmer. Leave it cooking for a long time. Like a really long time. The length of time depends, obviously, on the size of the shoulder. But, for example, 12 hours isn’t unheard of for a large one.

Step 4
Test for doneness by pulling a piece off. If it shreds off easily and is super tender, it’s done. The inside will absolutely be done if you’ve cooked it long, so you won’t have to worry about that. But if you’re nervous about that, make sure the internal temperature is about 190 – 200 F.

Step 5
Once it cools, shred it all off with a fork and store it in the braising liquid. You can freeze it in the liquid, too.

3 Jan 2012

Raisin Bran Muffins

Some may argue there is no ultimate bran muffin -- mostly because they think bran muffins taste like cardboard and dirt. But I challenge one of those bran naysayers to try one of these bad boys -- especially if they're having trouble with their plumbing.

Ingredients
1 1/2 cups of bran
1 cup milk
1/2 cup apple sauce
1 egg
2/3 cup brown sugar
1/2 tsp. vanilla
1/2 cup all-purpose flour
1/2 cup whole wheat flour
1 tsp. each of baking soda, baking powder
1/2 tsp. salt
1 cup raisins

Step 1
Preheat oven to 375 F.

Step 2
Pour milk, apple sauce, egg, brown sugar and vanilla into a large bowl and mix thoroughly.

Step 3
Stir bran, flours, baking soda, baking powder and salt together in separate bowl. Pour dry ingredients into the bowl with the wet ingredients. Mix until just combined. Stir in the raisins.

Step 4
Distribute the mixture into a greased muffin tin (12 count) or paper muffin cups if you prefer not to use grease.

Step 5
Place in preheated oven for about 20 minutes, or until they're done.

Tip
If you press down on the top and they spring back up, they're done.


Quick Tip: What to Do with Leftover Wine

Leftover wine? Never happens to the Geeks, but if you happen to have some extra, don’t discard it. Pour it into an ice cube tray, freeze and then transfer the wine cubes to a freezer bag. When you need some wine to finish a sauce or add to a stock, there’s no need to open a new bottle.

How to Pan-Roast the Perfect Steak


Step 1
Remove the steak from the refrigerator 30 to 60 minutes before you’re planning to cook it. Bringing it to room temperature will produce more even cooking. Pat the steak dry with paper towel, and season it generously with salt and pepper. Keep going, a little more salt, there you go! Preheat the oven to 375 degrees Fahrenheit.

Step 2 
Turn the stove onto high heat and place a stainless-steel or cast-iron pan on the burner, both of which are oven-safe. Allow the pan to heat up thoroughly, then add a couple of tablespoons of canola oil to the pan. If you try to add the fat  before the pan is hot enough, the oil will gum up. Once the oil is hot, place the steak in the pan and sear each side until a golden-brown crust is formed. This browning step serves a dual purpose: it kills any surface bacteria, while imparting the outside with a flavorful crust.

Step 3
Place the pan with the steak in your preheated oven and allow the internal temperature to come to between 128 and 140, depending on how you like it done. Check for doneness often by pricking the thickest part of the steak with an oven-safe thermometer. Remove the steak at the lower end of the range for rare to medium-rare, or at the higher end of the range for medium-well. The farther it’s cooked, the less tender it will be.

Allow the steak to sit for at least five minutes before serving to allow time for the juices to settle. If you cut it too soon, your steak just won’t be as juicy. Keep in mind the internal temperature of your steak will continue to rise for about five minutes while it sits, which is why you remove it when the temperature is still low.

How to Braise Beef


So you’ve got yourself a tough cut of meat, say a top round roast, a lean hunk of beef. 

Step 1
Remove your roast from the refrigerator at least an hour before you’re ready to cook. Bringing it up to room temperature reduces overall cooking times and produces more even cooking. Season the hunk the beef generously with salt and pepper. Seriously, don’t skimp on the salt.

Step 2
Place a Dutch oven on high heat. Add 2 tbsp. of canola or another cooking oil to the Dutch oven once it’s heated up. Then, once it’s thoroughly heated, using tongs, place your seasoned hunk of beef in and sear each side for about two minutes, or until a golden-brown crust is formed. Preheat your oven to 150 F.

Step 3 
Prepare the braising liquid. Finely dice some onion, carrots and celery and heat it up in the Dutch oven on the stove. There should be enough fat in it to sauté the veg, but if not, add some more canola oil. Once soft, add some minced garlic and heat briefly. Add your liquid (stock or tomatoes), then your acid (wine or beer). Add salt and pepper generously. Now have some fun. Flavor it however you’d like. I like Worcestershire sauce and a little Dijon mustard in mine. If my 9-year-old were making it, he’d put in ketchup because that’s his favorite food. And, voila! There’s your braising liquid.

Step 4
Place the seared hunk of beef in the braising liquid, which should only cover part of your roast. Remember, it sits in the liquid, it’s not immersed. Place the Dutch over, cover on, in the oven and allow it to cook for a long time.

How long, you ask? Until it’s cooked. Isn’t that annoying? That’s what my chef husband is always telling me. And now I’m telling you. Frankly, the longer the better. You want it in long enough to break down the collagen to form gelatine.

Beef Questions Answered...

The following are a few questions we've had specifically related to beef.

Why does my sliced beef have a shiny hue?
Meat contains iron, fat and other compounds. When light hits a slice of beef, it splits into colors like a rainbow. Also, there are various pigments in meat compounds which give it an iridescent or greenish hue when exposed to heat and processing. The meat is fine to eat unless it’s slimy, sticky or smells funky.

My mother used to rinse all her meat before she’d cook it. Is this really necessary?
Rinsing is not necessary. Any bacteria present on the beef’s surface will be destroyed during the cooking process.

What’s the longest I can marinade a piece of beef in the refrigerator?
No more than five days. While you’re cooking your beef, boil the used marinade and brush it on the cooked beef. Discard leftover marinade.

Is the red liquid in the beef packaging blood?
No. The cattle’s beef is drained after slaughter and only a small amount remains within the muscle tissue. Beef is about 75 percent water; it’s the moisture combined with the proteins that cause the red liquid.

Quick Tip: Hard-Boiled Eggs in a Hurry?

Need to peel a lot of hard-boiled eggs quickly? Once drained, shake the pot with the eggs inside, cracking the shells. Fill the pot with ice and water and let them sit until cool. The water will slip under the broken shells, which can then be easily removed.

Quick Tip: Oatmeal Ready-to-Go

If you love the convenience of instant oatmeal but not the price tag and added coloring, try this. 

Fill a resealable, sandwich-sized plastic bag with 1/2 a cup of quick-cooking oats, 1 tbsp. brown sugar, a dash of cinnamon and a handful of raisins. When you’re craving the sweet, homey taste of hot cereal, pour the ingredients in a bowl, cover with 2/3 cup of water and place in the microwave for a minute and a half. Alternatively, pour 2/3 cup of boiling water in the bowl, cover and let stand for five minutes. Presto! You’re breakfast is done.


Spaghetti Squash “Pasta”

Ingredients
1 medium spaghetti squash.
2 tbsp. olive oil
1/2 cup of chopped red pepper
1 garlic clove, minced
1 can plum tomatoes
Salt and pepper to taste
1/4 tsp. of basil
1/2 cup of parmesan cheese
2 tbsp. of butter


Step 1
Poke several holes in the spaghetti squash with a fork. Place in the microwave and cook for 10-15 minutes.
Alternatively, place the piereced squash in a shallow baking pan and bake for about an hour in a 375F oven.

Step 2
Place a frying pan over medium heat and let it heat up. Add the olive oil, then the red pepper. Cook the red pepper for a few minutes, then add the minced garlic clove. Cook the garlic for about 30 second, stirring constantly so it doesn’t burn. Add the can of tomatoes and season with salt and pepper. Allow the mixture to simmer for a few minutes.

Step 3
Scrape out the squash with a fork. It should resemble spaghetti. Toss it with the butter.

Step 4
Turn off heat. Add the chopped basil and squash to the tomato sauce. Mix well and place in bowls. Add parmesan cheese.

How To Season a Cast Iron Pan

Cast-iron pans are less expensive, more versatile and more durable than nonstick. This Geek’s favorite thing about cast-iron, and a similarity it shares with stainless-steel, is that it can go directly from stovetop to oven, making it the perfect cooking vessel for meats that should be seared before they’re finished off in the oven.
A few drawbacks of cast iron include its weight, and its maintenance. It needs to be cleaned and dried carefully after each use, without soap. It also may require the occassional seasoning to keep it in tiptop shape. Seasoning is easy to do, and creates a smooth, non-stick surface.

Step 1        
Clean pan thoroughly under hot, running water. Use a brush to scrub off any food residue.

Step 2
Dry the pan thoroughly with a clean dish towel, then place the pan on the stove over low heat to dry up any remaining moisture. Remove from stove.

Step 3
Put a few drops of vegetable or canola oil into the warm pan and rub it in with paper towel. Get some fresh paper towel, and rub it more firmly into the surface until any excess oil is removed. The pan shouldn’t look or feel oily.

Tips
If acidic foods or improper cleaning have removed seasoning and it’s looking dry and patchy, you’ll need to reseason. Heat the pan over medium-high heat. Wipe the inside with a piece of oily paper towel. Then use a piece of clean paper towel and wipe out any trace of oil. Repeat this process until the surface is smooth and slick.

The Ultimate Carrot Cake

If there’s a heaven, its inhabitants would spend their days watching reruns of Six Feet Under and noshing on this fabulous cake. It’s that good. Moist and delicate with a hint of citrus, this carrot cake is one for the books. 

Ingredients
 5 or 6 medium-sized carrots
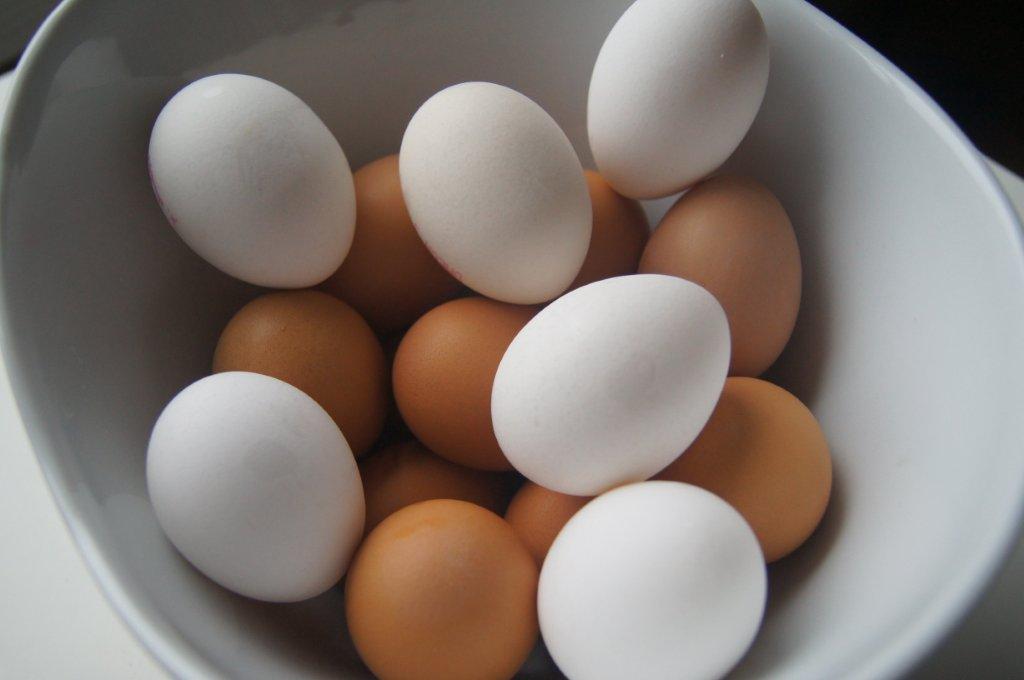
4 eggs
1 ¼ cups granulated sugar
2/3 cup brown sugar
1 cup canola oil
1 small container of orange, lemon or vanilla yogurt
2 tsp. vanilla extract
The zest of one orange
2 ¼ cups unbleached all-purpose flour
1 ½ tsp. baking powder
1 tsp. each of baking soda and cinnamon
½ tsp. salt
¼ tsp. nutmeg
8 oz. plain cream cheese, room temperature
¼ cup of unsalted butter, room temperature
2 tsp. vanilla extract
The zest of one lemon
2 ½ cups of confectioners’ sugar

Step 1     
Preheat your oven to 350 F.
Grate the carrots and place them in a large mixing bowl. We like a fine grate here at The Kitchen Geeks, but if you like them coarser, with big hunks of carrot, that’s a matter of choice. In a separate bowl, beat the eggs.

Step 2
Pour the eggs in the large bowl with the grated carrots and add the sugars, oil, vanilla and zest. Mix well.

Step 3
Mix all the dry ingredients in a separate bowl, careful not to overmix.

Step 4
Pour the dry mixture slowly into the wet mixture and mix until just combined.

Step 5
Get your baking vessels ready. We like to use 3 8-inch square pans for a triple layer cake – mostly because that maximizes the cream cheese frosting surface. You can use two round pans, one large round pan or even a 9-by-13 rectangular pan.
Cover the bottom of the baking pans with parchment paper, then cover the sides and parchment with a thin layer of butter. If you don’t have parchment, just use butter. Use some butter from the ¼ cup deligated for the icing; your frosting won’t need quite that much.
Step 6
Bake in a preheated oven until the center pops to the touch. If you touch the top and it sinks without popping up, it’s not done. For the three small pans, that’s about 20 minutes. For one large pan, it’s more like 45. Keep a close eye and don’t overbake or you’ll lose some of that heavenly moistness. 

Step 7
Mix the cream cheese and ¼ cup butter (less the amount you used to grease the pans) together using a standing mixer. Once smooth, add the vanilla. Reduce the speed of your mixer to low, and slowly add the sugar in batches. Mix for about five minutes, or until all the lumps are gone. Stir in the lemon zest and it’s ready to go!
Now just ice the cake and you’re ready to go!

How To Roast Beets

Beets are both yummy and messy (if we’re talking about the purple-skinned buggers). They have an earthy, delicious flavor, and are high in fiber, folate and vitamin A. Many home cooks are reluctant to prepare beets from raw because of the potential for nasty stains. Especially where kids are involved. If you’re brave enough to just deal with purple hands, beets are an amazing addition to salads, or just eaten on their own. You can also pickle them by putting them in the liquid from an empty jar of pickles. If you don’t want to deal with the mess, there are golden beets and candy-cane-striped beets, as well, that don’t stain and have a very similar taste. All beets look awesome on a plate, but candy cane ones are especially funky.

Step 1
Preheat the oven to 425 F. Trim off the ends of the beets, and scrub them thoroughly under cool, running water.

Step 2
Place the beets on a large piece of foil that’s been folded in half. Drizzle with water. Wrap the foil over and seal the package tightly.

Step 3
Place the package on a baking sheet and put it in the oven. Heat until tender, about an hour, depending on the size of the beets. You can test the tenderness by piercing them with a fork; if you meet little resistance, they’re done. Be careful not to burn your hand with steam when you unseal the package.

Step 4
Once the beets cool, peel them by hand. The skin should come off easily.

Tips
Try to find similarly sized beets so they’ll cook evenly.
Smaller beets are generally preferable as large ones tend to be woody and tough.
Good-quality beets are well-formed with a scantily haired root. If the body is crooked or the roots hairy, they’ve likely struggled to grow and might be tough.
Beets and beet greens should be stored in the refrigerator.
Try sauteing the green with garlic and olive oil for a healthy, delicious treat. Make them like you’d make spinach; they taste just like beets.

How to Make Fish Stock

A fish stock is a liquid made by boiling fish or shellfish bones and various other fishy parts in water, together with flavorings. Unlike meat-based stocks, you don’t want to simmer the liquid for long; any more than an hour and you’ll risk extracting a cloudy calcium substance from the bones or shells. If you were considering throwing the gills in there, don’t: they can cause a raunchy flavor that is just plain yucky.

Step 1
Use only very fresh fish and fish parts. Remove the gills and scrape the spine clean of any blood.

Step 2
Chop up the fish coarsely, then soak and rinse it to remove off flavors and discoloring.

Step 3
Saute chopped onion, carrots, celery and garlic in canola oil in your stock pot until soft.

Step 4
Add fish parts and saute until opaque.

Step 5
Add just enough cold water and wine to cover the fish pieces. Heat uncovered to a simmer and maintain that; don’t allow it to boil. Simmer the liquid for about 30 minutes.

Step 6
Skim the scum and particles from the surface of the stock as it simmers.

Step 7
After an hour or so, pour the stock through a fine sieve or cheesecloth, careful not to push on the parts.

Step 8
Cool the stock quickly by placing the pot in ice or pouring it into smaller containers that will cool more quickly. Store in an air-tight container in the refrigerator, or, for long-term storage, in the freezer.

How to Make Vegetable Stock

Vegetable stock is a flavorful base liquid used for cooking fish, grains and pasta, as well as being a base for vegetarian soups and sauces. Avoid veggies with strong flavors like cabbage and its sulfrous relatives, Brussels sprouts, kale and cauliflower. Basically things that make you fart. You can include whatever veggies and herbs you like: carrots, onions and leeks contribute sweetness, celery, saltiness and mushrooms add savoriness. Tomatoes are sweet, tart and savory. Wine and vinegar add tartness along with other layers of aroma unique to the type.

Step 1
Rinse your vegetables under cool, running water. Cut them into small pieces and include the peelings.

Step 2
Saute the veggies briefly in butter or oil before adding the water.

Step 3
Add cold water to the pot, and bring it to a gentle simmer. Aim for about two parts water to one part vegetable, measuring by weight. One cup of water is a little more than a ½ lb.

Step 4
Add any wine or vinegar after you’ve been simmering the veggies for about 10 minutes. If you add it too early, it will interfere with vegetable softening and flavor extraction.

Step 5
Simmer the stock gently, careful not to boil, for another 30 to 40 minutes. If you simmer it too long, it will develop an unpleasant aroma.

Step 6
Strain the stock through a fine sieve or cheesecloth, careful not to press on the veggies, which causes cloudiness.

Step 7
Cool the stock quickly by placing the pot in ice, or pour it into smaller containers to speed the cooling process. Store in the refrigerator, or the freezer for longer-term storage.

How to Make Meat Stock (Chicken Stock, Beef Stock, etc.)

Meat stocks are liquids made from boiling the meat, bones and skin of cattle, lamb, chicken, turkey or other animals – not usually monkeys, though, because they’re cute. Unlike vegetable and fish stocks, a meat stock benefits from a long simmering time. Gelatin is a protein thickener that develops as the connective tissues dissolve by long cooking; it contributes thickness and a rich flavor.

Step 1
Soak the bones in cold water to remove any blood.

Step 2
Rinse the raw meat, bones and skin to remove any off flavors that are present in their surfaces. Cut the meat into small pieces and crack the bones to increase the surface area; this will allow more water penetration and extraction of flavor.

Step 3
For a neutral, white stock, place meat, bones and skin in a pot of cold water and bring them quickly to a boil. Blanching removes any off flavors and prevents clouding. Once it boils, pour off all the water and rinse.
For a brown stock with a roasted flavor, brown the raw meat, bones, skin and veggies in a hot oven first. Then, deglaze the roasting pan with water, and add the liquid to the stock pot along with the roasted meat parts.

Step 4
Add enough cold water to just cover the bones, about 1 to 2 quarts or liters per 2 lb. or kg. Too much water, and you’ll get a weak-flavored stock. Heat the contents uncovered to maintain a simmer; bringing it to a boil will cause cloudy stock. An open pot cools the surface of the stock and dries the protein scum which helps the concentration process. Skim the scum from the surface.

Step 5
Add any aromatic herbs and veggies as well as wine during the last hour of cooking, such as carrots and onions.
If necessary, add more water to make sure the solids are just covered.

Tips
Cook poultry stocks for one to four hours.
Cook veal, pork and lamb stocks for four to eight hours.
Cook beef stock for six to 12 hours.

2 Jan 2012

How to Roast Green Beans

Green beans, aka snap beans or French beans are a great source of vitamins and minerals, as well as dietary fiber. They’re also easy to find year-round and relatively inexpensive. The green bean casserole, an invention of the Campbell’s Soup Company to boost sales of their cream of mushroom soup is a common side dish at Thanksgiving. The casserole combines green beans with the canned soup from concentrate and (gasp!) canned fried onions to produce an interesting, not-so-healthy side dish. Sure it looks appetizing, but why not try something simpler, healthier and more delicious?
Roasting turns the starches into sugar, and the results are both sweet and tender – much like myself. One note: they don’t look the same as your run-of-the-mill boiled beans. Rather than being bright and green, they’re a bit shrivelled and brown. Not to worry, the taste makes up where appearance lacks.
Last thing: my kids absolutely love these.

Step 1
Preheat oven to 425 F.

Step 2
Rinse green beans under cool, running water. Line them up and cut off the ends. In a bowl, toss the beans in 1 tbsp. of olive oil to coat. Season generously with salt and pepper.

Step 3
Line a baking sheet with parchment paper or aluminum foil. Place beans in a single layer on sheet.

Step 4
Roast the beans for 10 minutes. Remove the tray and redistribute the beans, shake ‘em up. Place back in the oven for another 5 minutes or so, or until they start to brown.